- Trade fair
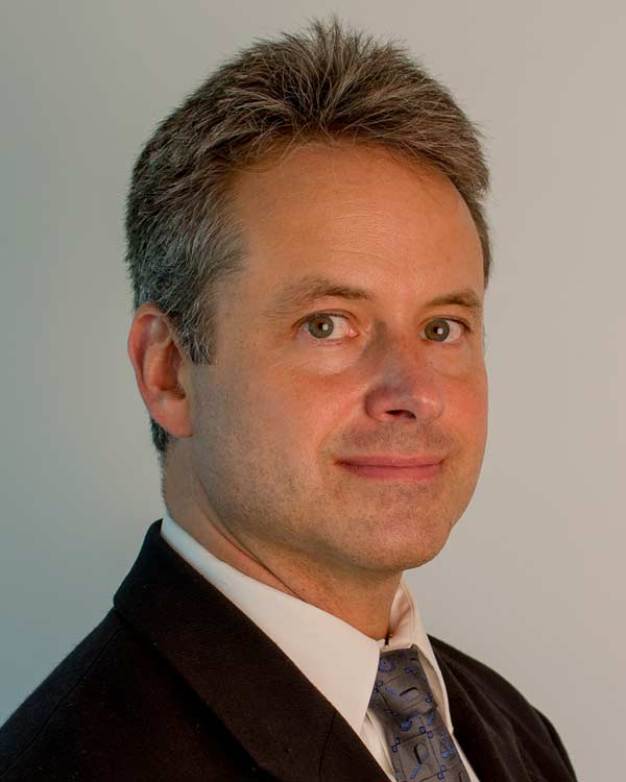
Interview with Dr. Kai Dirscherl on his presentation at the Cleanzone Congress in Frankfurt
“The industry requires traceability in quality assurance”
Traceability requires uniform units of measurement and reliable measurement methods. Without these, international comparability of quality assurance in the field of cleanroom technology would not be possible. Metrologist Dr. Kai Dirscherl will be speaking at the Cleanzone Congress (22 – 23 October 2013) about measurement uncertainties, the importance of international standards and what sheep have to do with this field of research. The scientist agreed to talk with us about his presentation on “Traceability of particle size and number concentration”, which he will be giving on the first day of the congress in Frankfurt.
Dr. Dirscherl, what does “traceability” mean?
In metrology, traceability is a fundamental property for the analysis of measurement results. It refers to an unbroken chain of comparison measurements, so called calibrations, where the individual measurement uncertainty is known at each step. This chain of calibrations is finally related to a recognised standard, i.e. a reference standard, a reference material or a reference instrument.
You are a researcher and quality manager at the Danish National Metrology Institute (DFM) in Lyngby. What is your field of activity, and where do you come into contact with cleanroom technology?
I have been working in various fields at DFM for some seven years now, and since the middle of this year my main focus has been the coordination of our new department for particle metrology. This field of research was previously a part of the nanometrology department, where we support the micro-, telecommunications and semiconductor industries. However, the field of particle metrology is growing increasingly important. Not only in the pharmaceuticals industry, but also in other high-technological applications there is a growing chorus calling for consistent and reliable international standards for particle measurement and its documentation. In light of these pressing circumstances, we decided the time was right to establish this independent department.
In what areas is metrology currently being deployed in the field of cleanroom technology?
Lord Kelvin once said: “If you cannot measure it, you cannot improve it.” It is said that anyone who measures a lot will measure a lot wrong, and this really is an area that requires our attention. And as measured quantities get smaller while at the same time a higher accuracy is demanded, even minimal inaccuracies become significant. For example, every particle counter - like every other instrument - is subject to measurement uncertainty. This means that we have to accept a certain measurement error, and therefore we must know its value. Quality requirements continuously increase, and customers request from the industries to meticulously document the purity of their products and facilities more than ever before . This includes not only the measurement results themselves, but also the calibration of the instruments used - including the traceable documentation of their measurement capabilities. For this propose, companies urgently need generally recognised calibration certificates. This is the objective of the Mutual Recognition Arrangement (CIPM MRA) concluded in 1999. This international agreement provides for the mutual recognition of calibration and measurement certificates issued by national metrology institutes. It is a response to a growing need for an open, transparent and comprehensive scheme to give users reliable quantitative information on the comparability of national metrology services and to provide the technical basis for wider agreements negotiated for international trade, commerce and regulatory affairs. It is the task of modern metrology to create the conditions in which agreements such as these can be reached, i.e. to define universal standards and to make available verified measurement methods and recognised certificates.
What is the most difficult part of this task?
The traceability of measured quantities to generally valid and accepted reference standards is the fundamental prerequisite for reliable measurements and the comparability of results, the development of standard procedures and safeguarding product quality – not to mention the mutual recognition of products and services rendered. The provision of a primary standard for particle number concentration is the responsibility of national metrology institutes. This is no minor task, as different types of particles, such as combustion particles and bacteria, require different measurement methods. At DFM we have established a primary standard that allows the calibration of particle counters, which are typically used in cleanroom environments. Methods related to the particulate emissions of modern combustion engines for example are currently being developed in European Metrology Research Projects (EMRP), collaborations of multiple national metrology institutes. As we discussed, measurement uncertainties are unavoidable here – we must simply deal with them sensibly and use the technological means at our disposal to minimise them. That is why we believe that developing reliable standards for this purpose is one of our biggest challenges.
What approaches are you pursuing in order to tackle measurement uncertainty?
When dealing with measurement uncertainties, it is necessary to analyse the measurement methods. Cleanroom particle counters typically work according to the same principle: the air to be tested is sampled and the particles contained therein are measured optically. For this purpose, the particles are exposed to light. The subsequently scattered light allows us to draw conclusions about the number and size of the particles in the air sample. Measurement uncertainties of up to ten percent are still typical. The implementation of the method can be problematic, however, as manufacturers do not have any guidelines regarding the wavelength, i.e. light colour, to be used. Different wavelengths generate different scatter intensities, and therefore different measurement results. While manufacturers do take this into account, the fact that manufacturers generally calibrate their customers' devices themselves – i.e. internally – remains a critical factor for the general comparability of the measurement results. Our approach is to create neutral references in order to achieve improved comparability. An example: For our internationally recognised certificates, we use our own controlled test aerosols and particle counter as the primary standard. We confirm our measurement capability on a regular basis in international comparisons with other metrology institutes, as it is required by the MRA. This ensures that measurement results are transparent and comparable. The thus achieved traceability allows us to create an international degree of equivalence for the calibrated instruments like that called for in the MRA, and quality assurance benefits as a result. Companies that are able to obtain certification in this way from a recognised institute can benefit from their location advantage worldwide.
From your perspective, what are the biggest challenges facing cleanroom technology for the future?
So far we've been mostly talking about lifeless particles, something that we have a pretty good command of by today's standards. In future, one of the biggest challenges will be the measurement of viable particles. Traditional particle counters are unable to distinguish between dust and bacteria, which means that the current determination of bacterial contamination continues to be based on a count of the particles between 0.5 and 5 micrometres in size – the most common size of bacteria – in combination with cultivation tests. In order to verify that a product has not been contaminated with bacteria, it is therefore necessary to hold it back for up to three days after it has been manufactured in the plant, as this is how long it typically takes to finish the cultivation of a test sample for viables. The next generation of instruments therefore integrates an additional measurement method using UV light, taking advantage of the fluorescence emitted by organic substances. This makes it possible to measure not only the number and size of the particles in the classic sense, but also to register their fluorescence signal. These innovative developments are a positive step towards real-time measurement, yet they still have some weaknesses. For example, UV measurements are still quite slow, meaning that it is usually only possible to examine a fraction of the sampled air with UV light. Taking the typical measurement uncertainty into account, it is very difficult to obtain a representative result in this way. In extremely sensitive areas such as the pharmaceuticals industry and medical technology, it will therefore remain necessary to rely on cultivation tests – and to accept the loss of time this entails. Yet achieving reliable real-time viable detection continues to be our goal. In metrology we are already working on new calibration systems and applicable standards for this area.
What factor is primarily responsible for the creation of modern metrology, and what is its role today?
Metrology is actually a very old science, as people have been measuring and counting since time immemorial, be it the width of a field or the size of a flock of sheep. Even so, the units in which people count have changed a great deal over the ages. For example, until the18th century the human body was typically the basis for measurement units of length, such as the cubit, foot and pace. The problem was that these units were typically related to a living person, such as the length of the ruling pharaoh's forearm or even the circumference of the regent's belly. In France alone there were some 250,000 different units of measurement in the 18th century. The Renaissance heralded the beginning of calls for the standardisation of measurement units. This was the case in the worlds of science, politics and business, as the exchange of goods and knowledge across local and national borders required uniform standards. Even so, it was not until the French Revolution, which gave rise to the metre, that our current standard unit of length came into being. When creating the prototype of the metre in 1799, a great deal of effort was made to find a neutral reference that could be used by everyone. The result: the Earth. A metre was defined as one ten-millionth of the length of the Earth's quarter meridian through Paris. Today we know not only that the scientists made a little error in their measurements, but also that our globe is not a perfect sphere. Yet it is the idea that matters: a uniform, reliable and recognised unit of measurement that serves as the basis for communication across borders. It is a concept that we continue to pursue to this day, as it is the fundamental requirement for the progress we make. Without standards – i.e. without comparability and quality assurance across international borders – this would not be possible.
Dr. Kai Dirscherl's presentation on “Traceability of particle size and number concentration” can be heard at the Cleanzone Congress in Frankfurt am Main on 22 October 2013.
![]()
Cleanzone
Messe Frankfurt Exhibition GmbH
Ludwig-Erhard-Anlage 1
60327 Frankfurt am Main
Germany
Phone: +49 69 75756290
Fax: +49 69 757596290
email: anja.diete@messefrankfurt.com
Internet: https://cleanzone.messefrankfurt.com

